


 Caring for Cropped Ears

Having our puppies ears cropped is a cosmetic procedure that we choose to do. If you have chosen to have your puppies ears cropped, this information is for you.
Cropping is a form of art. You will not find many veterinarians that know or want to know how to crop. This is not taught in Vet schools. To find a qualified vet who has the talent to crop is not always easy, but we feel that our vets are some of the best. One of our vets that we use for this is 4½ hours away from our home. That's one direction. The other we fly in from Wyoming.
So, you see we do take this seriously and we hope you do as well, for it takes all of our patience and work. It is time-consuming and expensive. We want Standard Schnauzer ears on our dogs, not mini-schnauzer ears, so understand they will be longer in size compared to the mini's. With that said, there still is no guarantee that they will stand.
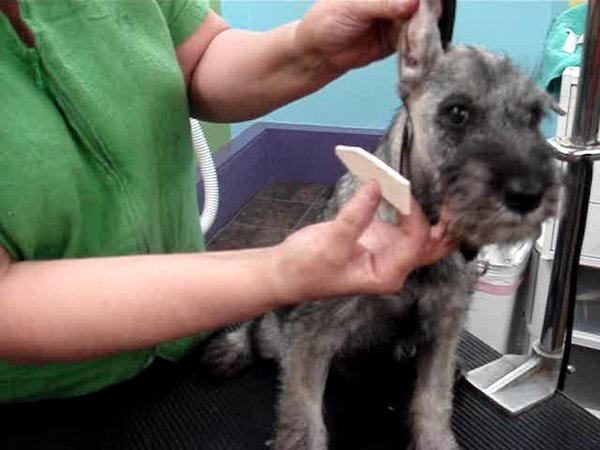
We feel it is our responsibility as reputable breeders that our puppies need to stay with us for at least 2 weeks post surgery to make sure the ears heal properly. We start to post the ears as soon as there are not open edges. We also demonstrate to new owners how to continue to post after the pup goes home. We count on you to continue this posting until they stand.
Also, you need to know that the ears, as the tail, tend to grow after cropping and docking. It is possible to have the ears cropped identically and then have one appear to grow a bit more than the other. This doesn't happen very often, but I have seen it happen.
All puppies have different kind of ears and ear leather. There are puppies that have an heavier ear that takes more time to stand, and you have to post the ears for months. If you are not constant with doing so, chances are they are never going to stand. It is frustrating, but you need to be patient.
The thinner smaller ear is easier to get to stand, but harder to let natural. Less weight, so these ears, natural, without taping or gluing may stand on their own. So the proper care for natural ears also is something your breeder can also show you.
Your puppy will be, on the average, 8 to 10 weeks old. Our pups start to teethe at about 14 to 17 weeks of age. You have until then to get these ears to stand or hang down.
As the pup starts to lose his baby teeth, the body seems to draw all calcium out of the cartilage of the ear to help with teething. Teething also puts stress on the body's system, and I can tell you that some ears will fall during this time, even if they have been standing for weeks. If this happens, go back to posting; there is no timeline on how long you should post. Continue until all adult teeth are in or when they stand again.
We have both worked hard to this point, so now is not the time to give up! We are asking the ear to do the exact opposite of what nature has intended. So this doesn't happen overnight.
Please think about the time, work, expense that goes into this procedure. If you feel that you cannot do this posting, then find a vet or breeder that can. There are tons of ways to post cropped ears, so just because it is different than we showed you, don't think it won't work. Everyone has their own way of posting.
Taping Schnauzer Ears
Here are the materials you'll need:
Elastikon Tape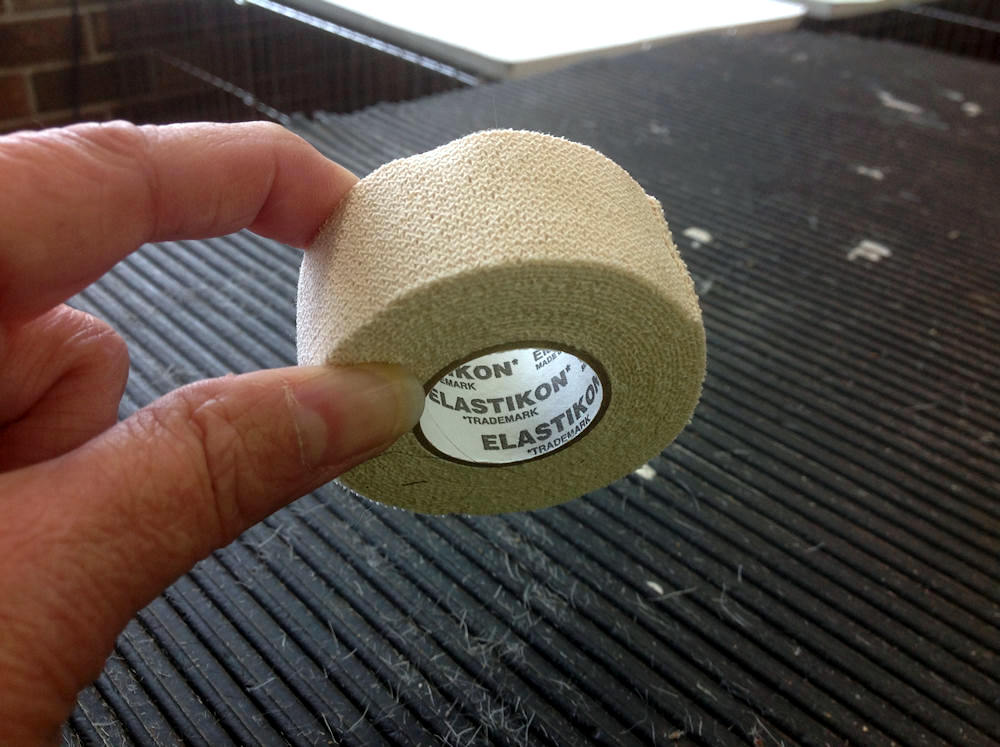
|
Kendall Tape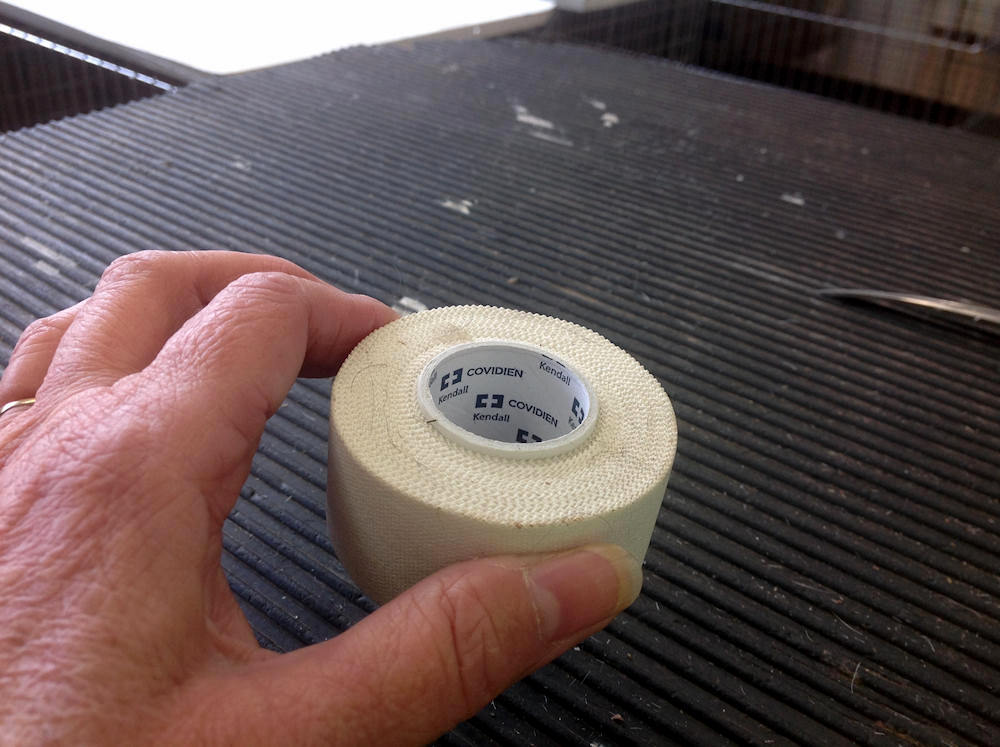
|
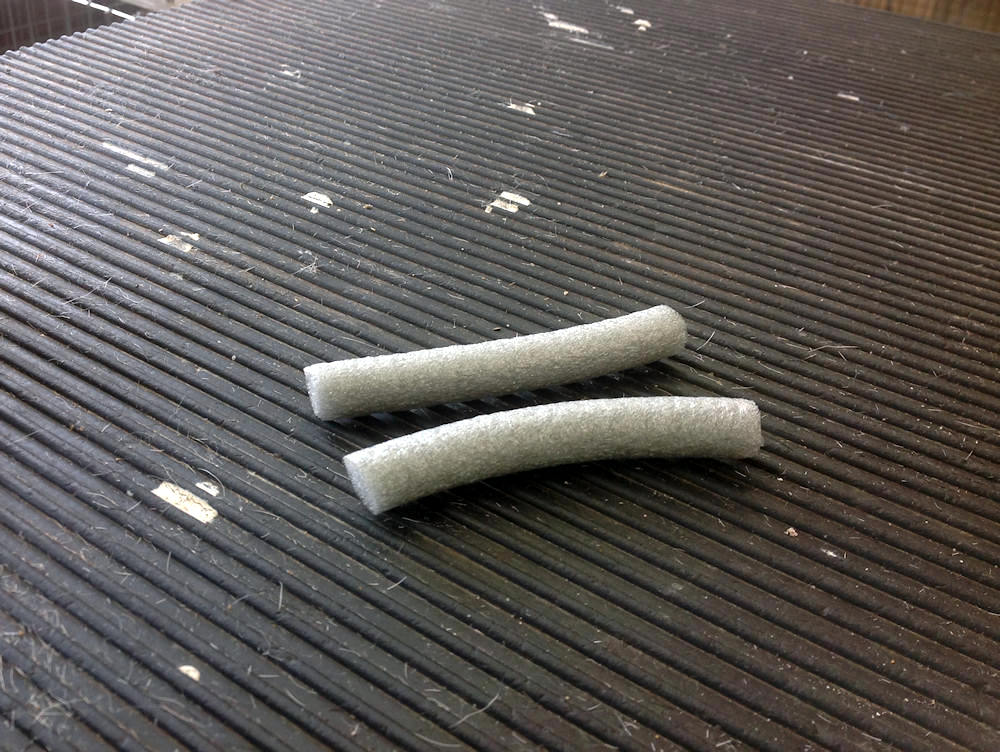
½-in. Backer Rod (Lowe's)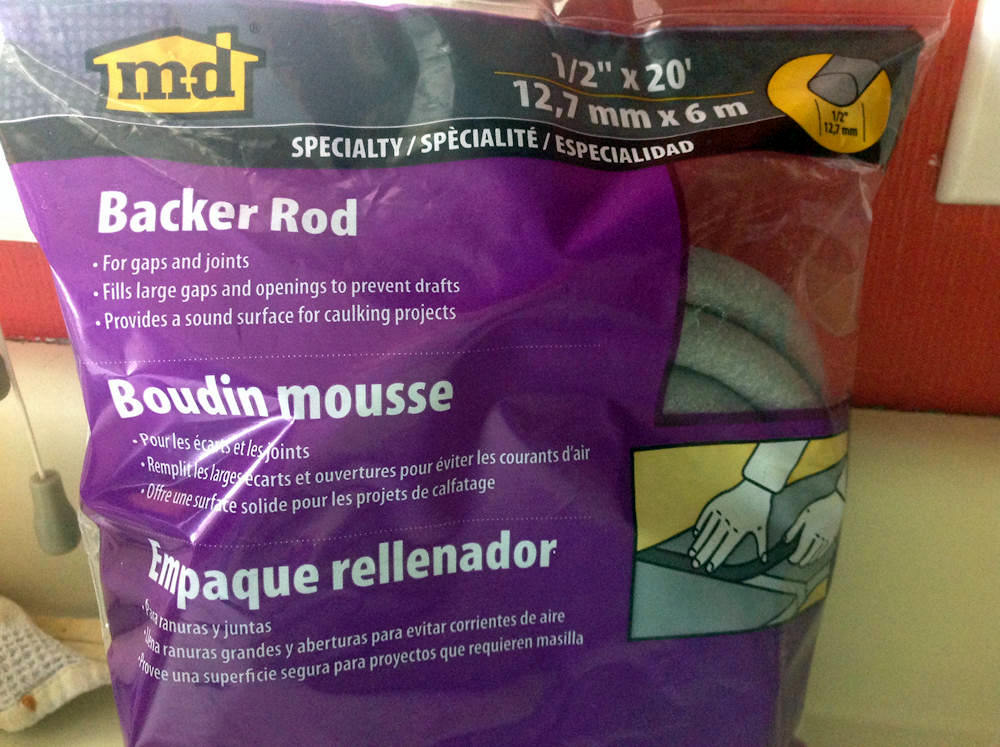
|
Duct (or Duck) Tape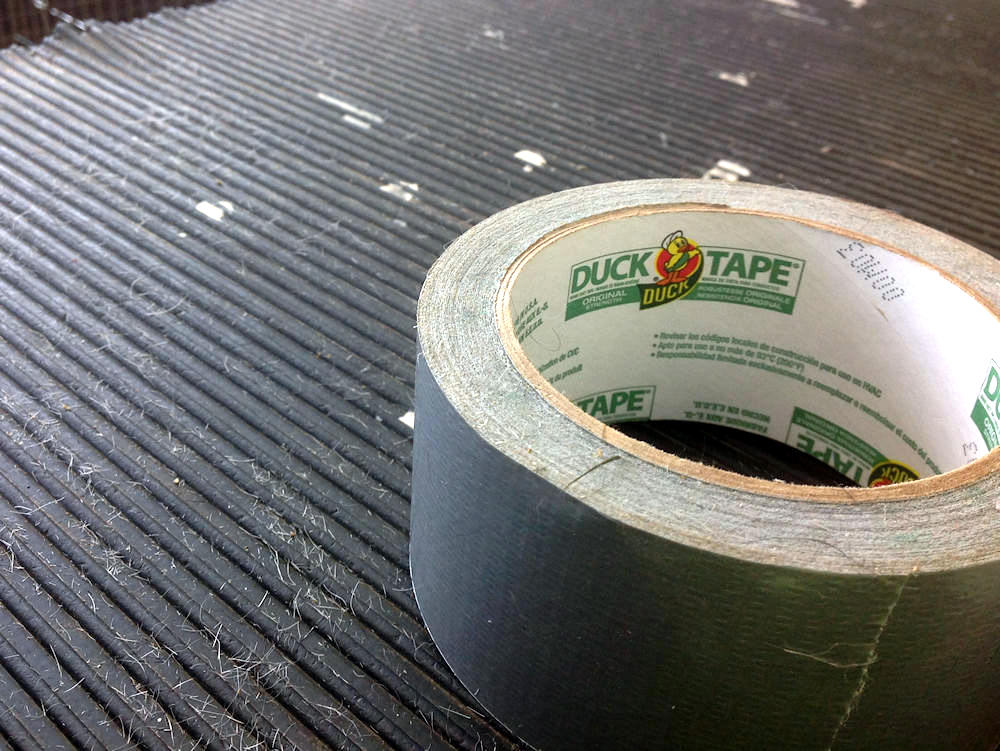
|
Step-by-Step

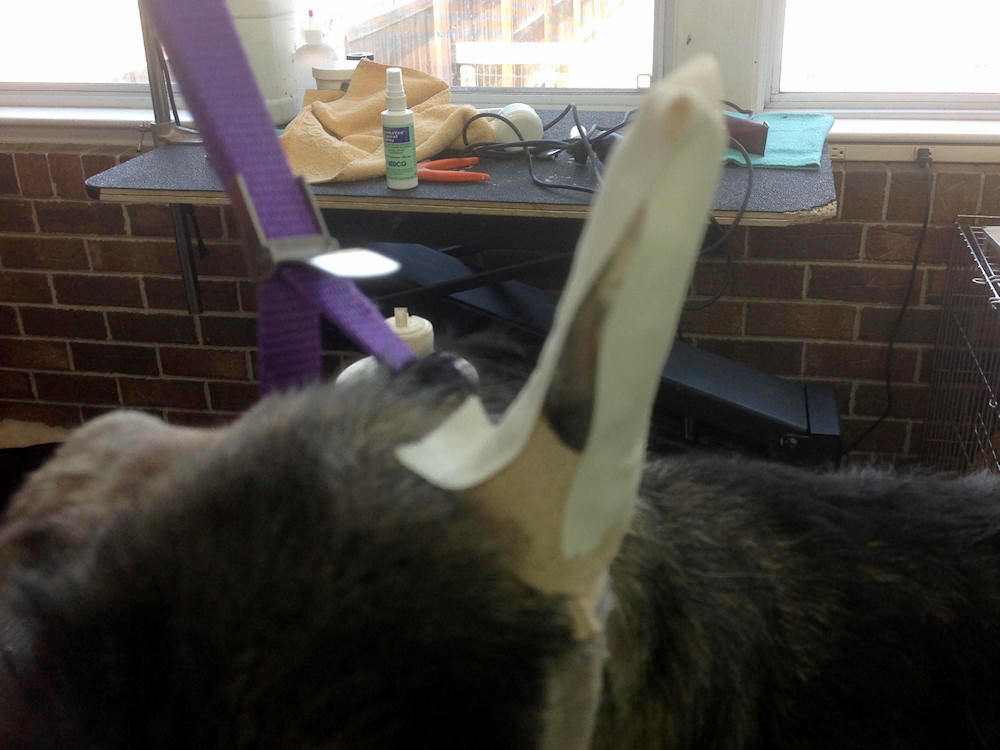

- Cut 2 pieces of Elastikon tape for around the base, about 4 inches long.
- Cut 2 pieces of Kendall tape about 4 inches long.
- Cut 4 smaller pieces of Kendall tape about 3 inches long.
- Cut 2 pieces of Duct tape, 4 to 5 inches long.
- Cut your backer rod the length of your dog's ears.
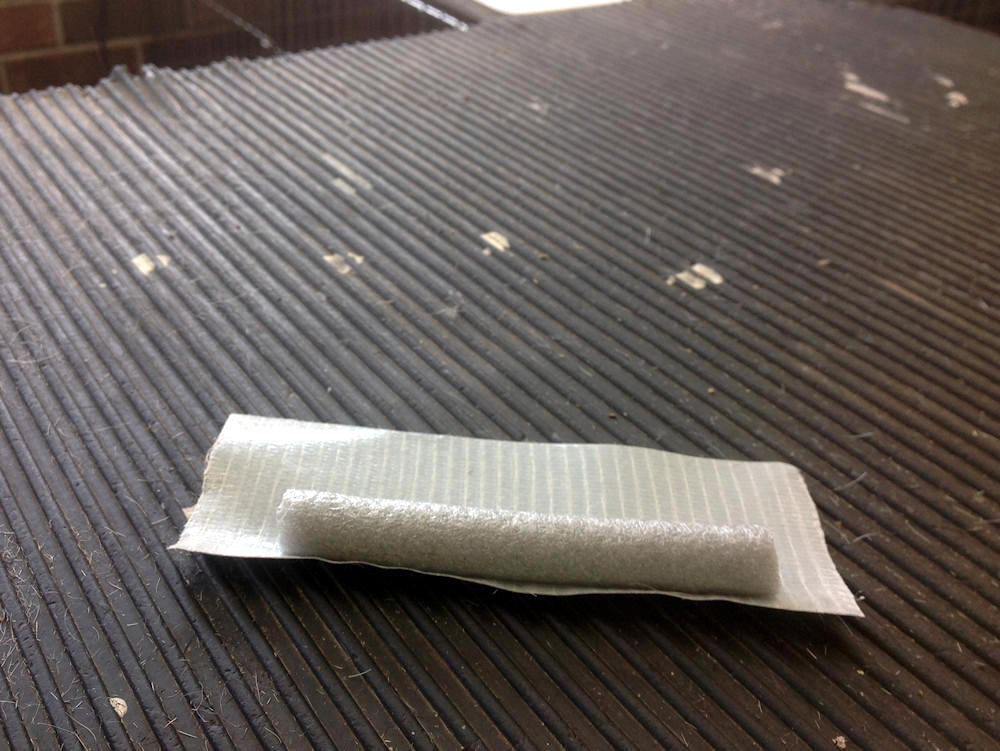
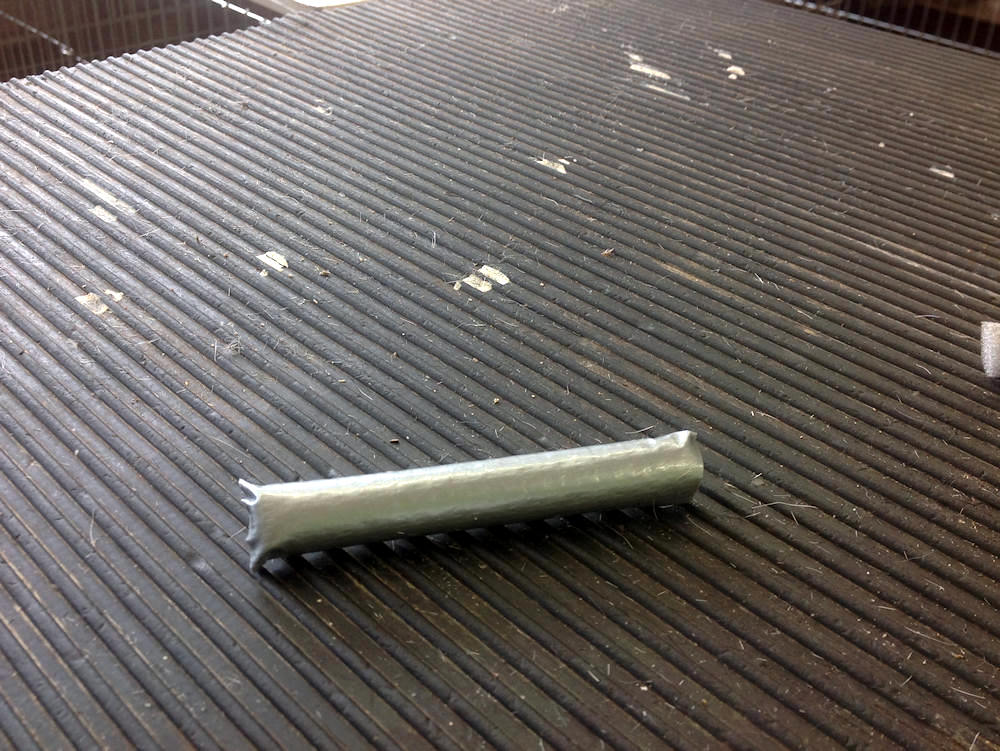
- Wrap backer rod in Duct tape.
- Take a piece of Kendall and wrap the backer rod with the Duct tape on it, sticky side out.
- Place this into the dogs ear. Make sure it is down in the ear canal.
- Take your Elastikon tape around the base of the ear, start with the tape on the sticky tape in the front of the ear and wrap around the ear, not real tight.
- Take the Kendall 4-inch piece from the bottom of the ear to the tip and over against the sticky part.
- Take the small 3-inch pieces around the ear.
- Take a 6-inch piece starting at one ear and around the other ear making the brace.
- Please look at the picture for help!